Sunday, August 30, 2009

Acrylic stamp storage

Call me a nerd BUT I have ALWAYS loved the anticipation of the upcoming school year (even still and I don't even GO to school! ;) ) I could spend HOURS looking at school/office supplies and LOVE to peek at each aisle to see what goodies I can find-and even better in August when school supplies are greatly discounted!
* * * * * * *
On my last trip to the new Staples in my neighborhood, I discovered THIS: a 4" binder. I KNEW it would be perfect for my ever growing stamp supply and only paid $8 for it!


I picked up some baseball card holders at the local dollar store-they fit all of those great mini stamps we collect and I was able to manage to use the inside folder to hold my larger & more awkward stamps.


* * * * * *

I picked up this presentation folder (which has a nifty snap on it) to house my collection of 4x6 stamps from the same manufacturer and was able to get some heavy-duty 8.5x11" page protectors to keep some of my other stamp sets together and organized. Now when I need to find a stamp, I just pull out the binder and leaf through until I find what I need.
* * * * * * *

This is a great way to keep your stamps easily accessible, great for on-the-go scrappers & perfect for someone like me (who forgets all the stamps they have and greatly under-utilizes them :) )
Now if I could just figure out a great way to store (and see my wood mounted stamps, I'd be set! If you have any ideas or suggestions for me, it would be FAB! Leave me a comment!
Have a great day!
Cindy :)

Thursday, August 27, 2009

So I Totally Missed My Post Date

Ooops! In my mind, it was supposed to be this Monday. But in reality, I guess it was the Monday before that. Well, once I get my Iphone and figure out the scheduler, I won't miss anymore! (My contract finally runs out tomorrow so I'm getting an Iphone - anyone have any recommendations on can't miss apps???? I'm very excited!!)

Since I'm so late, I thought I'd actually post an entire page that I made with the September kit. The colors in the kit are amazing for summer photos! I added the basic grey chipboard letters and painted them purple. Here's the first page of my 2-page layout:


I had so many pictures from Tiny Town when we went in July! I played a lot with my camera on manual and got some really BAD photos and some really decent ones. When I got tired of checking the settings I went back to auto :)

So, don't you love the LYB papers? They are perfect for so many summery layouts! The big reveal is next week and you can check out the Sussies gallery for so many fun ideas from the Design Team! I always look forward to seeing what other people did with the same kit!

So I'm bouncing around on topics this time, but are all your kids back in school now? Mine started Monday and my youngest started full day kindergarten. I have to say it's so quiet around the house! Our nights are packed with gymnastics and soccer practices so I'm trying to enjoy my downtime - I even scrapped today!!

I'll try to post on time next time :) and hope you're enjoying some Sussie scrap time too!

Monday, August 24, 2009

Hand Cutting for Deminsion and Embellishing

One technique that I love to use is fussy cutting or hand cutting. Lots of times there are elements in patterned paper, such as flowers or stars, that just scream to be cut out. While I do use images and elements from patterned paper itself, today I'm going to highlight stamping.

One easy way to always have the letters you need for a title is to use stamps. You never run out of "e" or "s". For me, it always adds so much more to the page when I cut them out rather than stamping directly on the layout.

You can also use any stamped image to add dimension to your page by cutting it out.
For this page I stamped and cut out the word "silly". I also used pop dots to raise it off the page.
I also stamped the little monkey and cut her out to add just a little something else.
So get out those precision scissors and get to cuttin'!
Supplies Used:
PP: Stampin Up!, Heidi Swapp, October Afternoon, Scenic Route
American Craft Thickers (Green)
Alpha Stamps and Monkey: Autumn Leaves
Scallop Border Punch: Fiskars

Monday, August 17, 2009

Love it

Splatter Painting Tutorial


Here is a painting technique that is fun to do on layouts (just make sure you do it outside- don't want paint on the floors.)
You will need any type acrylic paint and a little pump squirt bottle. I found empty ones in the travel section of the cosmetics area of my Target. Then squirt some paint into the bottle. Add water. For my example, I added quite a bit of water to my red so it was rather watered down when I squirted. My turquoise was more if a thicker paint consistency. Add the water a little at a time to get the look you want.
My mom is in town (yay I love help!) and she also suggested that you can flick paint on with an toothbrush for another splatter technique.


We went to see Lyle Lovett last week, so I couldn't pass up the chance to scrap about it. I am always saving ticket stubs, so time to put it to use. All items are from past Scrapbook Sussies kits. Yep, I save everything too!

Here are some of my sneaks for September. If you haven't seen the full reveal check it out here! It has been such a versatile kit and all the embellishments are adorable. Have a great week!
Val

Friday, August 14, 2009

Recycle Leftover Sussies

Hi y'all!!
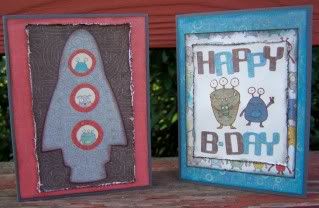
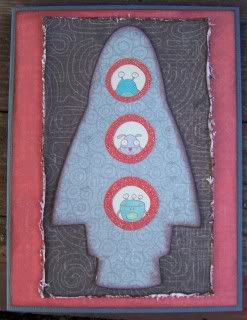
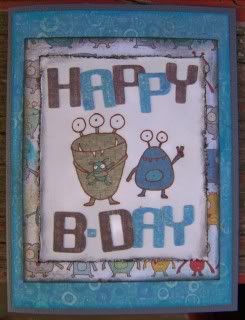
So I was finishing up with one of my kits and I was realizing that there were still lots of cute "left-overs". I am curious what you guys do with your leftover sussies? Do you leave them in the bag and store it away... do you add all the leftovers to your stash... do you use every possible little piece? I usually bag all mine back up, but I have gotten in the habit of making at least one card with my leftover kit items. There are usually several scrap pieces of paper and some cute embellies left that are perfect for cards!!

Here is what I made with some of the leftovers from the July kit:

Photobucket

Photobucket

Photobucket

So my challenge to you, use up some of your leftovers, and make a card or two! Link it back to this blog post and I will draw a name at this end
of this month for a RAK!
(maybe the prize will be some unused Sussies "leftovers"!!)

Happy Weekend!!
Zoa :)

Tuesday, August 11, 2009

Minibook Tutorial

Ok, here it is, just like i promised!!
Here is the project we will be making... it uses the Aug Sussies kit!!


Supplies:
chipboard (cardboard, boxes, anything sturdy will do. Even cardstock if it's all you have!
1 binder ring
hole punch (cropodile works fab!)
sanding block
Sussies August kit... or a bunch of scrappin goodies!

Step one.
Cut chipboard into (2 or) 3 inch wide strips.
Start with the first one being (2 or)3x5.
3x5.5
3x6
3x6.5
And continue on, making each page 1/2 inch longer than the one before it! You can make as many pages as you like! Even make the first page smaller if you like!
Once you have all the pages you want, continue to step 2.

Step 2.
stack pages in order as they will be as your minibook.
Begin by covering each page with patterned paper. I glue the chipboard and stick the paper to it. I then cut it out using a craft knife and a self healing mat.

For the front page, I used a piece of the Fancy Pants paper... in light yellow, to give a subtle cover.
Each page inside matches the opposite page. So when the book is open, the 2 pages are the same paper.
Once all pages are covered, use a sanding block to soften the edges.

Step 3.
Decide where you want your ring to go and punch the hole in the front page. Using it as a guide, punch all the pages and put them on the binder ring.

Step 4.
Punch out the chipboard shapes in the Cosmo Cricket chipboard. Keep the backing on them!!
Decide where you want them in your book. I used them on the outer edges to give a fun overhang on each and every page!
Once you have this decided, peel off only the part of the backing where it will stick to your page and adhere it! Continue with all the shapes you want to use!

Step 5.
Choose some other random shapes and embellies to add to the ring on the front. Punch a hole in them if necessary and add them! Ribbon also works great!

Step 6.
Design your cover however you like! Here's what I did...


i used a Cosmo Cricket rub-on for the water and whale on the bottom. Added a chipboard fish to the left as well as a chipboard water spray.
I layered the letters over and under the others to create a dimensional look.


The rest is up to you!!! Add photo's, journaling and all that stuff!!

Hope this was a help and would love to see what you create!!

Post here if you make your own minibook and you just might be surprised!!! I just might have a RAK to send your way!!

Feel free to post any questions!
Happy Scrapping!

Sunday, August 2, 2009

Hi! It's me, Cindy!

Hello Everyone!

WOW!! Did you spot all that fabulous CHA deliciousness below?? Thanks for sharing those photos, Lara!
I was SUPER excited to be invited as the newest Sussie last month and have been having a BLAST playing with these awesome, colorful kits!

A bit about me: I am a SAHM to a beautiful & crazy 4 year old Little Man & a wife of 8+ years to my equally beautiful & crazy Highschool sweetheart. I have been scrapping for almost 4 years. My style seems to be evolving all the time, but I would say I am a primarily 'clean scrapper' with some artsy/whimsy thrown in.

I love to challenge myself with the things I struggle with (which for me is journalling), so I have attempted several pictureless LOs and was surprised by how happy I was with the results. It SUPER easy to do a LO of this type with my Sussies kit as there are TONNES of embellishments, I could easily keep my LO interesting even though I had no photos.

SO, my challenge for you is this: scrap something without a picture!

Below are a few examples to get your MOJO flowing!
* * * * * * *
Done with the July Kit.

* * * * * * *

I did this LO about the sensitive subject of my 4 year old's first time using the potty this year. It has been a LONG time coming!!


* * * * * *

This LO is about setting some goals for myself in 2009.


* * * * * *

And I spotted this fabulous LO from my teamate Valerie Allen in a previous post which you can read HERE:


Thanks for stopping by!!

Cindy :)

Saturday, August 1, 2009

CHA!!!

Oh ladies!! I have just come back from CHA and BOY DID I HAVE FUN!!! There were so many pretty things to look at, so many new lines to choose from.

For those of you who have never been, CHA is INSANE! It's huge and there's just so many things to see. I have figured out a system that works for me. The first day I spend collecting catalogs and making mental notes about which lines I really like. A lot of times the catalog either doesn't do the line justice or actually makes the line look better... This usually takes about 4-5 hours.

When I get back to the hotel after the first day, that's when the real work begins. I think I began around 5 pm this time and didn't finish until 2 in the morning (with an additional hour left of figuring the next morning). It's a challenge to decide which lines to use, which embellis go with what, what to use for the add-ons, what each vendor's minimum quantities are, etc... WHEW! I'm getting dizzy just thinking about it again.

After all the spreadsheets are completed (Remember - I used to be a CPA.) I go to bed. In the morning, I get up and fill out all of the order form from each vendor (I think this time there were about 20). Then, I head back to the show to place the orders.

This time, I was so efficient that I actually had some time to go around and get some good photos! Here they are for you! ENJOY! (Some might even be indicative of upcoming lines!!!)

ME! In the Doodlebug Design Booth!! (Gotta have my sweets!!)
Who wouldn't love to live here? (Another Doodlebug pic - their booth is sooo cool!)
THICKERS!!!!
PINK PAISLEE TWILIGHT LINE!

IMAGINISCE
CRATE PAPER - SEASON
CRATE PAPER NORTH POLE
KAISERCRAFT
ME!!! SCRAPBOOK DIVA!!!